Cloudflare WorkersでAuth0のJWTを検証する
----- 追記 ここから -----
更新:2024-12-18
Golang Ginのミドルウェアで、Auth0のJWTを検証する記事も書きました。
Golang GinでAuth0のJWTを検証する | 株式会社フルーデンス
----- 追記 ここまで -----
こんにちは。株式会社フルーデンスの小巻です。
Angularで簡易的なWebアプリを作っており、認証でAuth0を使っています。
バックエンドとして利用しているCloudflare WorkersでもAuth0のJWTを検証したので、その際の記録です。
Auth0の準備
Auth0でテナントを作成します。
さらに、APIを作成し、AudienceのIDを保存しておきます。
Angularの準備
まずは、Angularの準備をします。
ng new auth0-app --skip-gitcd auth0-app
ng g component component/homecd auth0-app
npm install @auth0/auth0-angularauth0/auth0-angular: Auth0 SDK for Angular Single Page Applications
以下のコードで、Auth0を使えるようにします。
// app.config.ts

import {ApplicationConfig, provideZoneChangeDetection} from '@angular/core';
import {provideRouter} from '@angular/router';

import {routes} from './app.routes';
import {AuthConfig, provideAuth0} from '@auth0/auth0-angular';

export const appConfig: ApplicationConfig = {
  providers: [
    provideZoneChangeDetection({eventCoalescing: true}),
    provideRouter(routes),
    provideAuth0(<AuthConfig>{
      domain: 'tenant-pq9.jp.auth0.com',
      clientId: 'rvZzi0u4T2Ex7IXeGjHwlYZ5Zt9MS96Q',
      authorizationParams: {
        redirect_uri: 'http://localhost:4200/',
        audience: 'https://api-endpoint-u5x/',
        scope: 'read:data write:data',
      },
    }),
  ]
};適宜、コンポーネントにthis.authService.user$.subscribe()をセットします。
// app.component.ts

import {Component, inject, OnInit} from '@angular/core';
import {RouterOutlet} from '@angular/router';
import {AuthService, User} from '@auth0/auth0-angular';
import {concatMap, tap} from 'rxjs';

@Component({
  selector: 'app-root',
  imports: [RouterOutlet],
  templateUrl: './app.component.html',
  styleUrl: './app.component.scss'
})
export class AppComponent implements OnInit {
  title = 'auth0-app';

  authService = inject(AuthService)

  ngOnInit() {
    this.authService.user$
      .pipe(
        tap((user) => {
          if (!user) {
            console.log('user not found');
          } else {
            console.log('user found', user);
          }
        }),
      )
      .subscribe()
  }
}HomeComponentに、ログイン、ログアウト、トークンを取得する関数を準備します。
// home.component.ts

import {Component, inject} from '@angular/core';
import {AuthService} from '@auth0/auth0-angular';

@Component({
  selector: 'app-home',
  imports: [],
  templateUrl: './home.component.html',
  styleUrl: './home.component.scss'
})
export class HomeComponent {

  authService = inject(AuthService)

  onClickLogin() {
    this.authService.loginWithRedirect().subscribe()
  }

  onClickLogout() {
    this.authService.logout().subscribe()
  }

  onClickGetAccessToken() {
    this.authService.getAccessTokenSilently().subscribe(token => {
      console.log(`token`, token);
    })
  }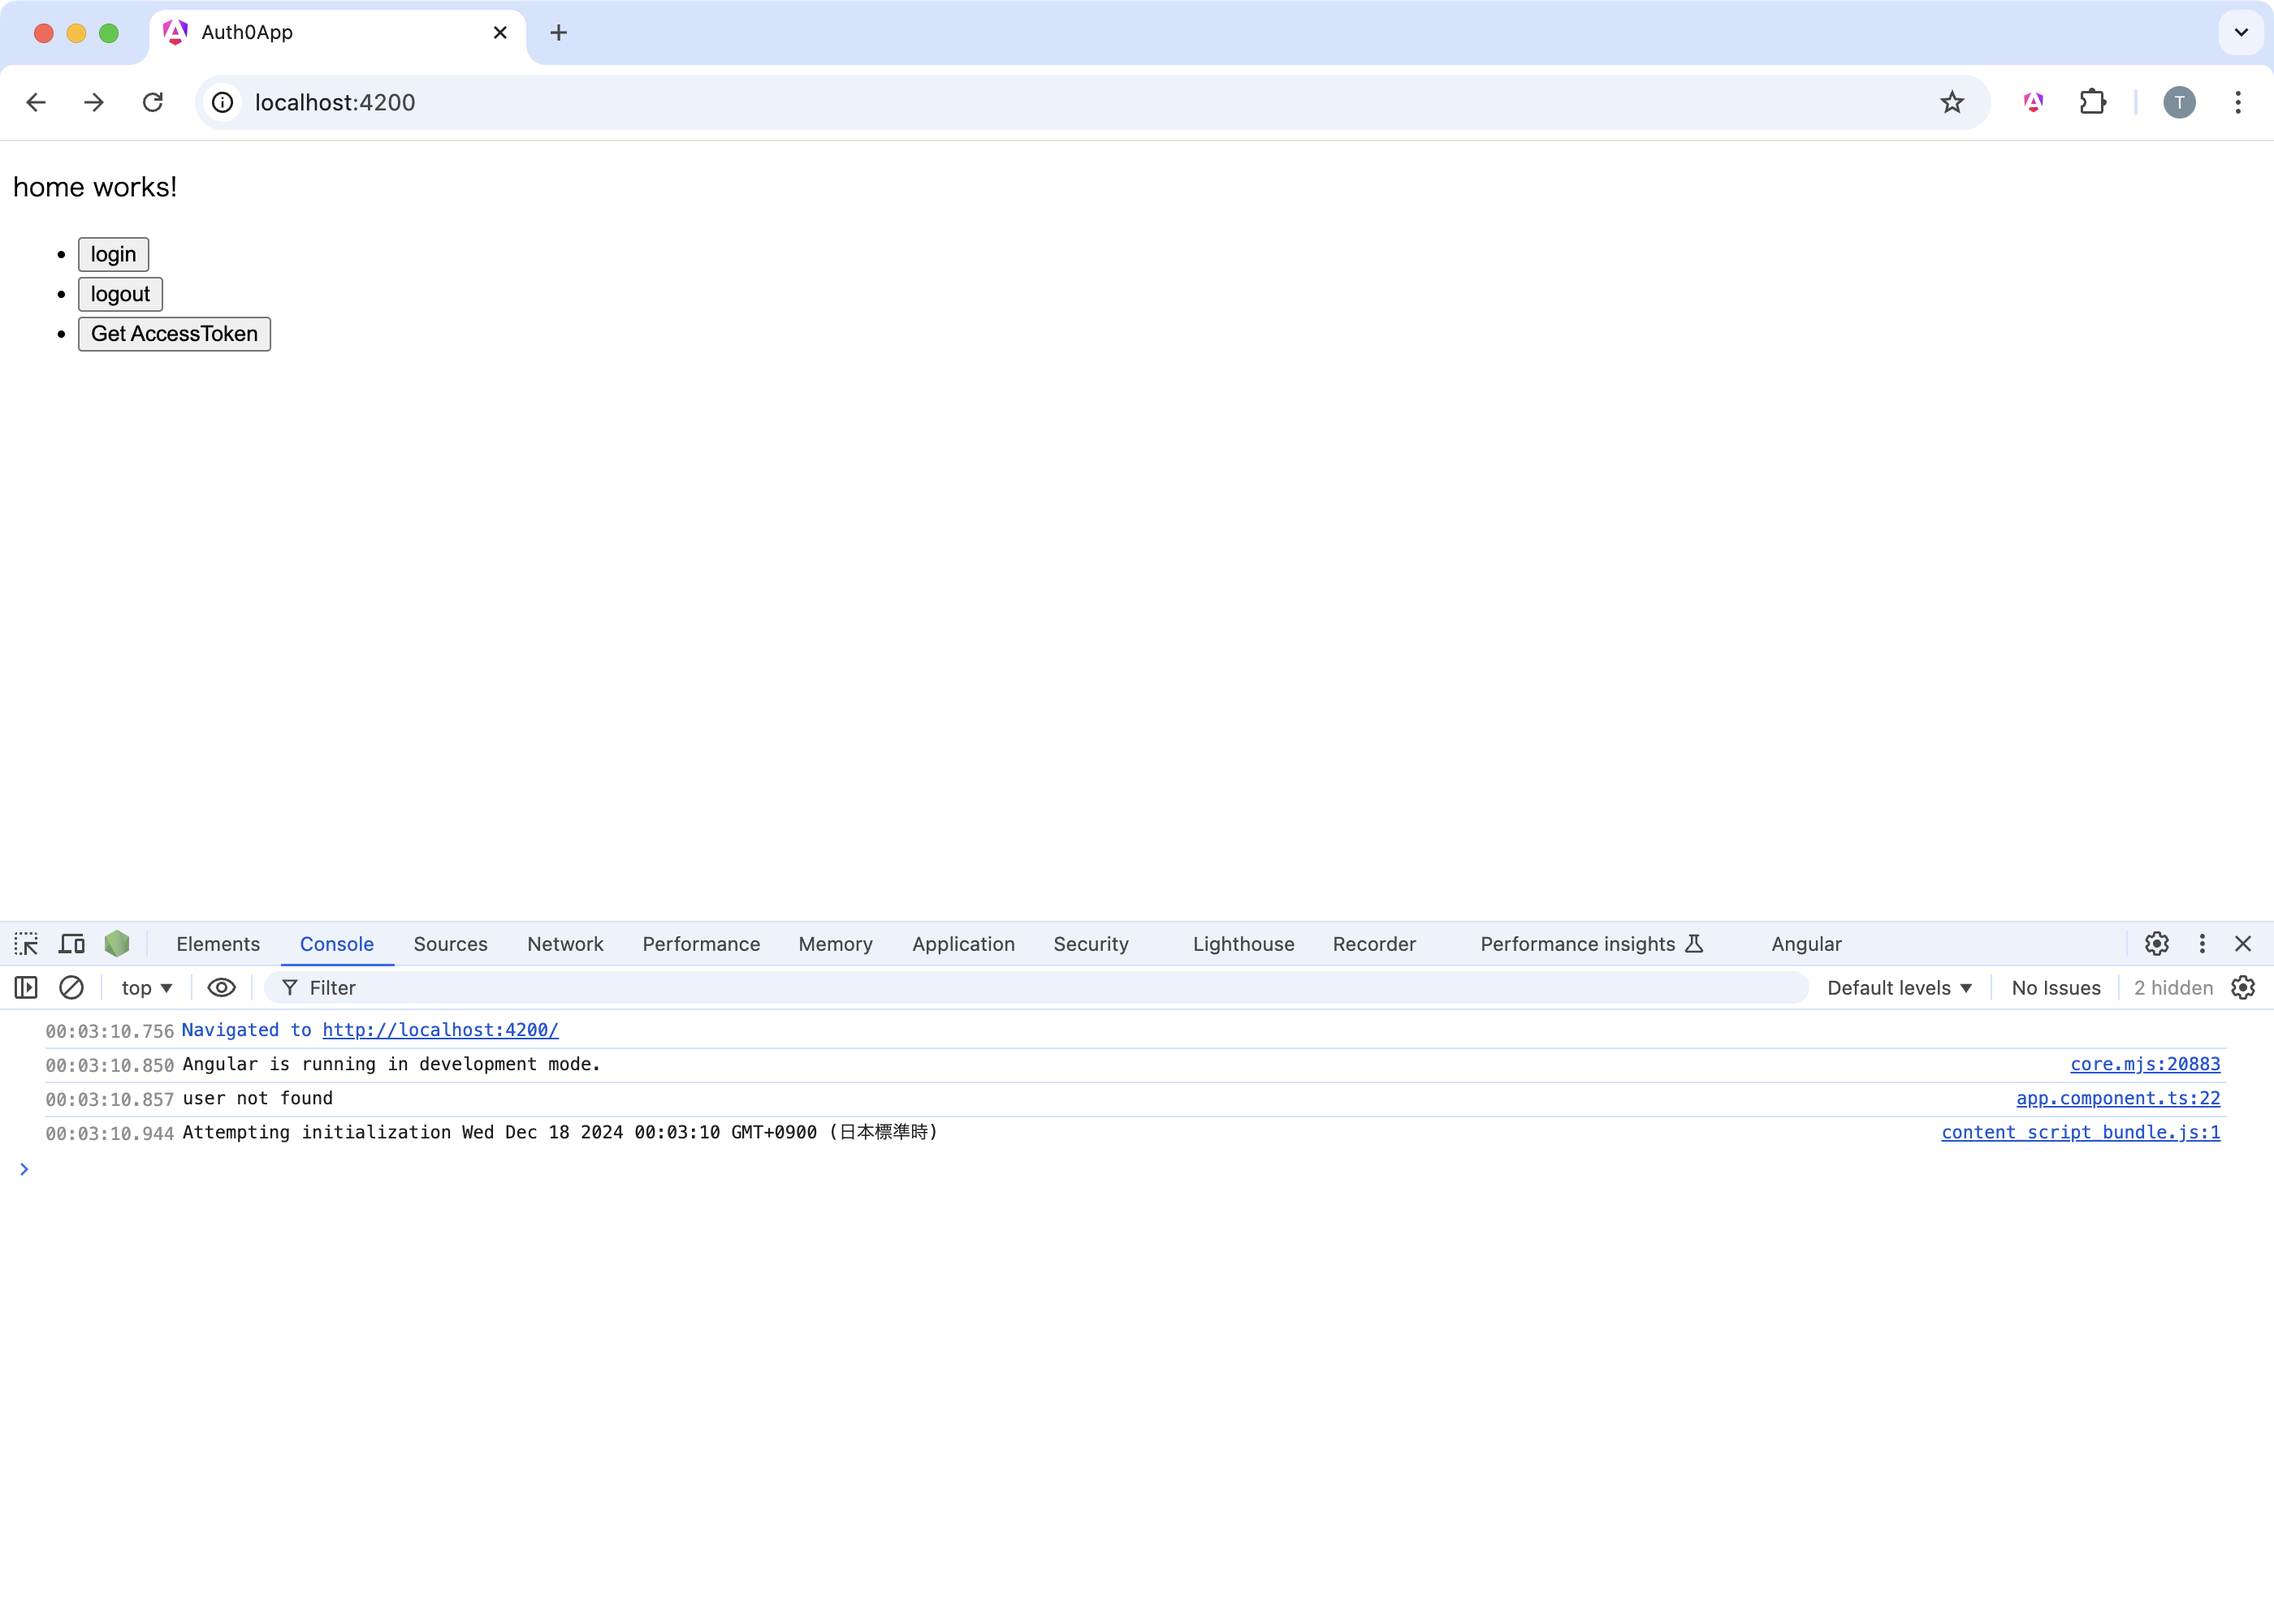
}// home.component.html
<p>home works!</p>
<ul>
<li><button (click)="onClickLogin()">login</button></li>
<li><button (click)="onClickLogout()">logout</button></li>
<li><button (click)="onClickGetAccessToken()">Get AccessToken</button></li>
</ul>Angularアプリをローカルで起動し、Auth0のトークンを取得します。

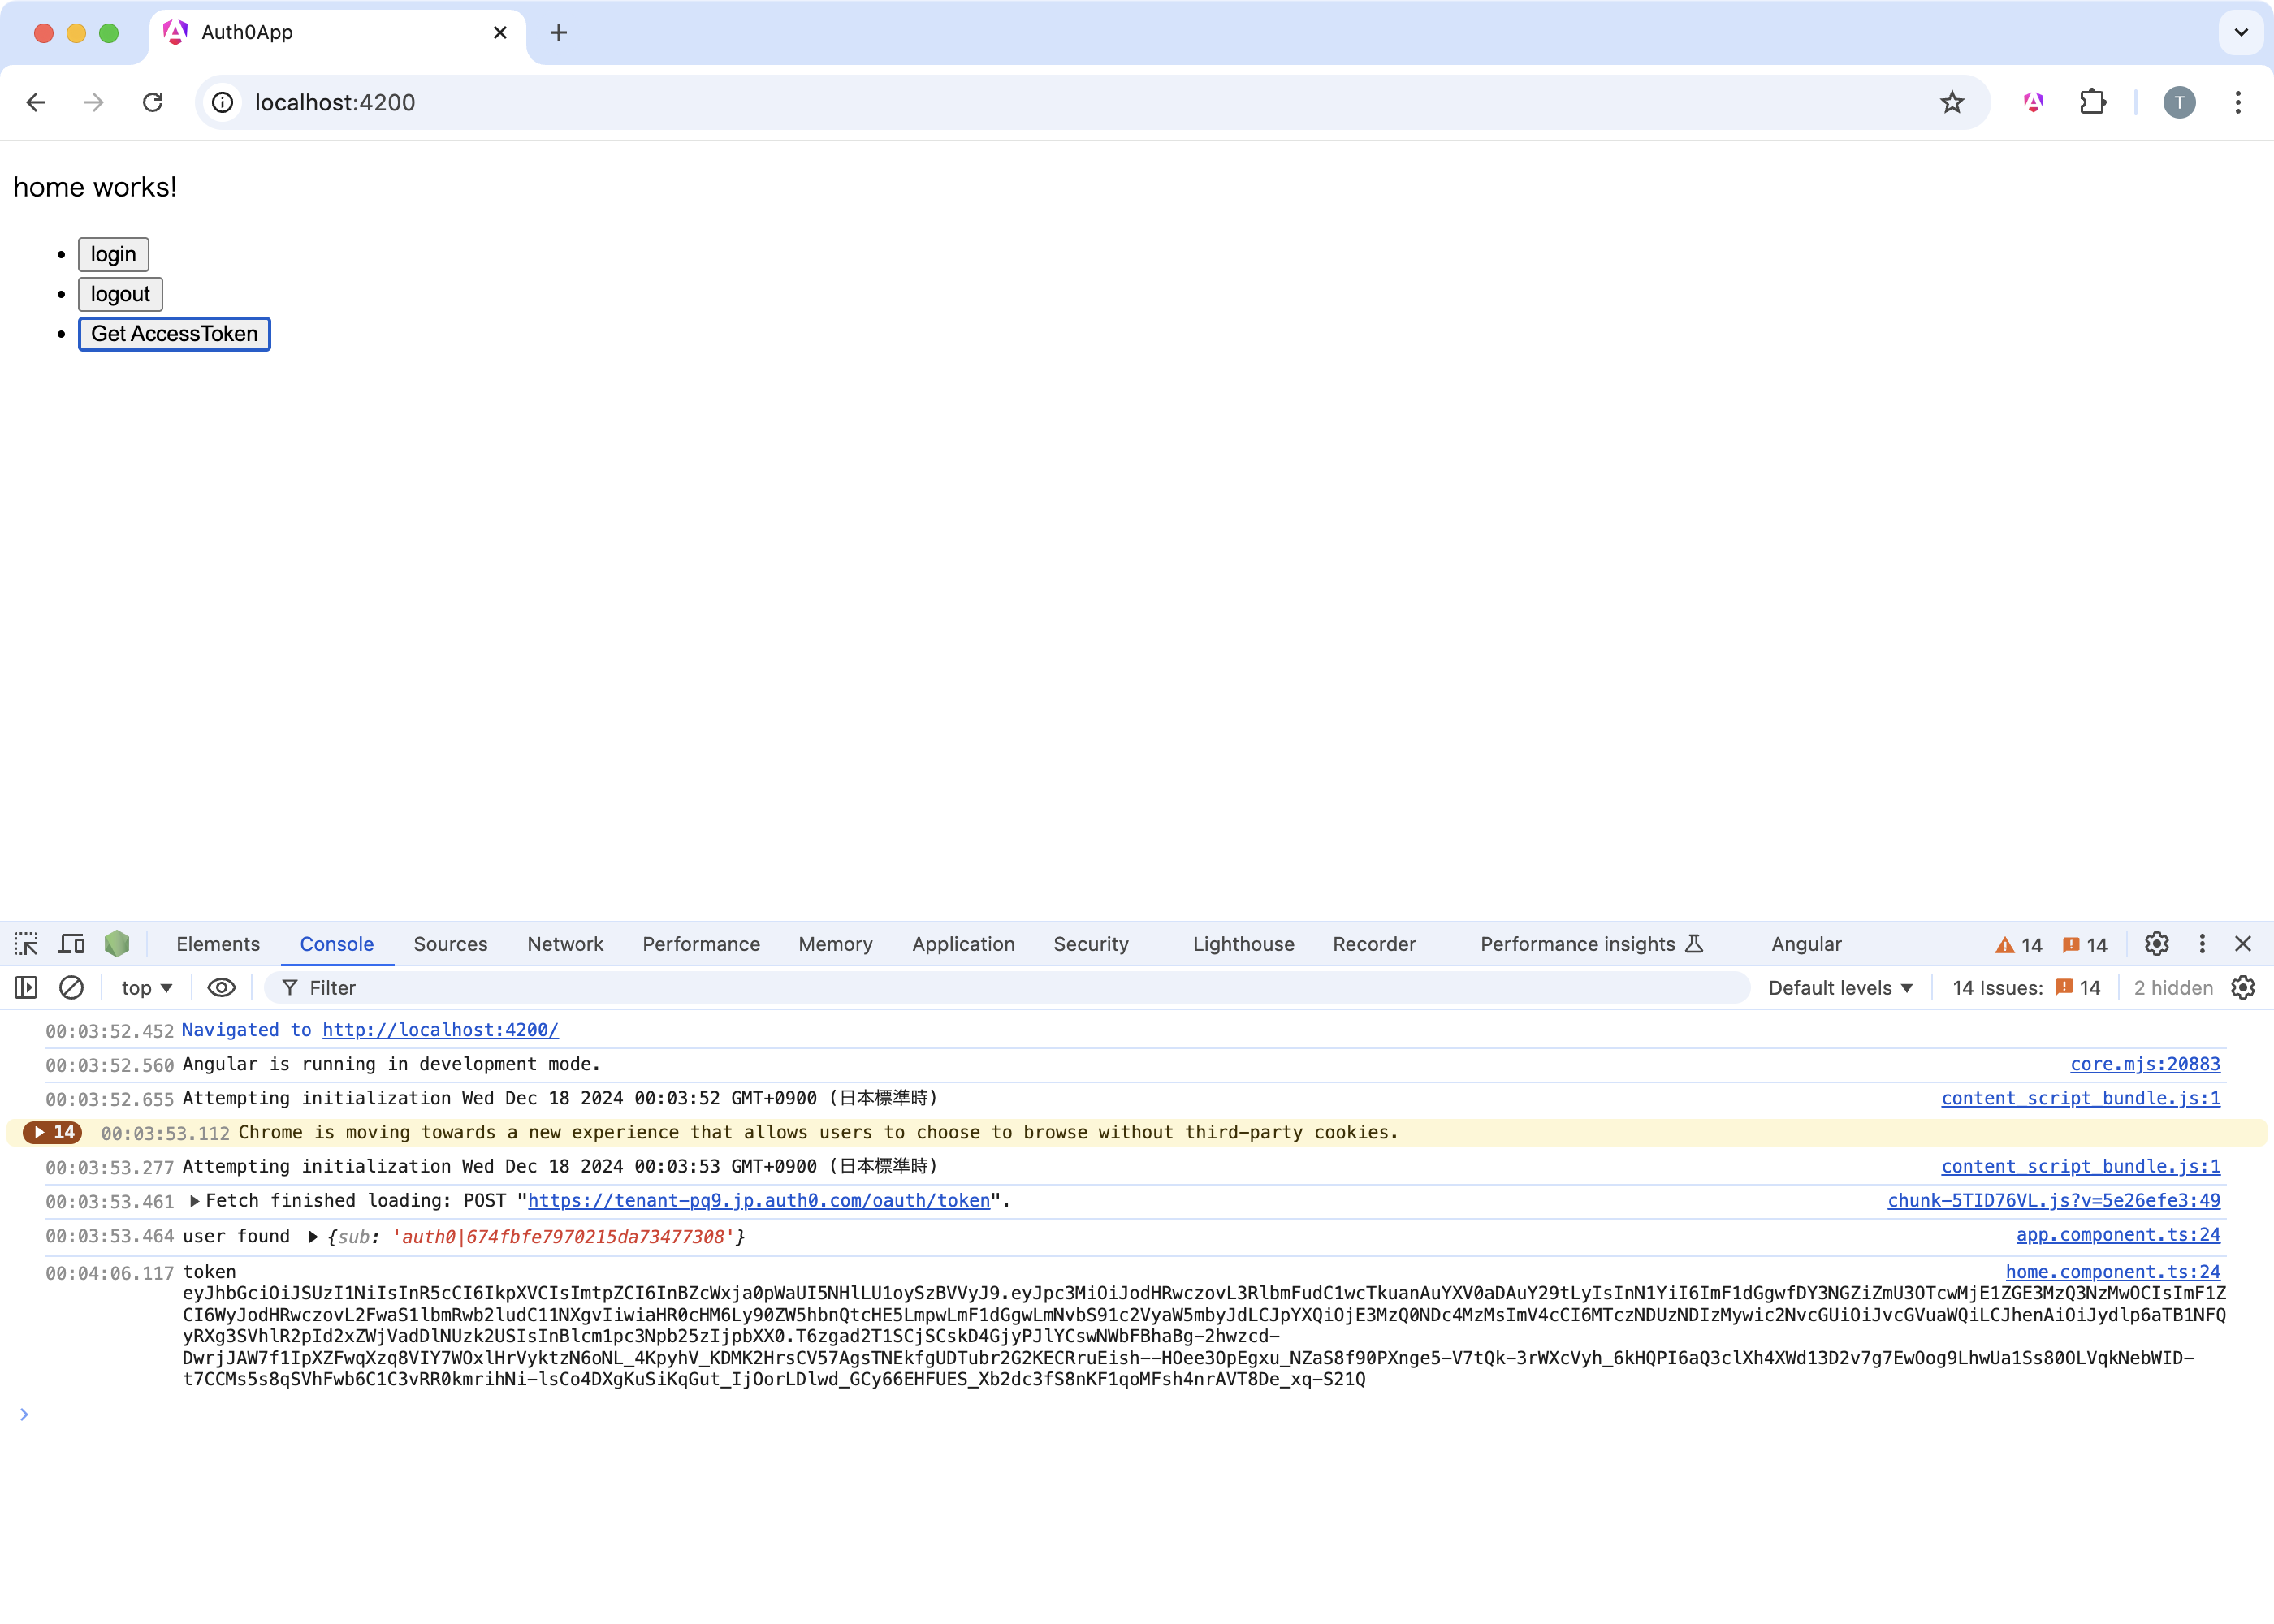
これで、Auth0のトークンを取得できましたので、Cloudflare Workersの準備に移ります。
Cloudflare Workersの準備
npm create cloudflare@latest auth0-jwt-validation-demo-pi5Create projects with C3 CLI · Cloudflare Pages docs
cd auth0-jwt-validation-demo-pi5
npm install hono@latestHono - Web framework built on Web Standards
cd auth0-jwt-validation-demo-pi5
npm install @cfworker/jwtcfworker/packages/jwt/README.md at main · cfworker/cfworker
本番環境と開発環境でIDを切り替えられるよう、環境変数を利用する設定をします。
# wrangler.toml

[vars]
AUTH0_ISSUER = "https://tenant-pq9.jp.auth0.com/"
AUTH0_AUDIENCE = "https://api-endpoint-u5x/"// index.ts
import {Hono, Context} from 'hono'
import {parseJwt} from "@cfworker/jwt";
// 環境変数の型定義
type Bindings = {
AUTH0_ISSUER: string
AUTH0_AUDIENCE: string
}
const app = new Hono<{ Bindings: Bindings }>()
app.get('/verify', async (c: Context) => {
try {
const authHeader = c.req.header('Authorization');
if (!authHeader || !authHeader.startsWith('Bearer ')) {
return c.text('Unauthorized', 401);
}
const token = authHeader.split(' ')[1];
// 環境変数 (c.env) から Issuer と Audience を取得
const decoded = await parseJwt({
jwt: token,
issuer: c.env.AUTH0_ISSUER,
audience: c.env.AUTH0_AUDIENCE,
});
console.log(`decoded`, decoded);
if (!decoded.valid) {
return c.text('Unauthorized', 401);
}
return c.text('ok', 200)
} catch (e) {
return c.text('Unauthorized', 401);
}
})
export default appローカルで起動します。
wrangler devCommands - Wrangler · Cloudflare Workers docs
/Users/teruhiro/.n/bin/npm run start

> auth0-jwt-validation-demo-pi5@0.0.0 start
> wrangler dev

 ⛅️ wrangler 3.96.0
-------------------

[wrangler:inf] Ready on http://localhost:8787
⎔ Starting local server...
╭──────────────────────────────────────────────────────────────────────────────────────────────────╮
│  [b] open a browser, [d] open devtools, [l] turn off local mode, [c] clear console, [x] to exit  │
╰──────────────────────────────────────────────────────────────────────────────────────────────────╯ローカルで起動できたので、先ほど取得したトークンを投げて、validになるかどうかを確認します。
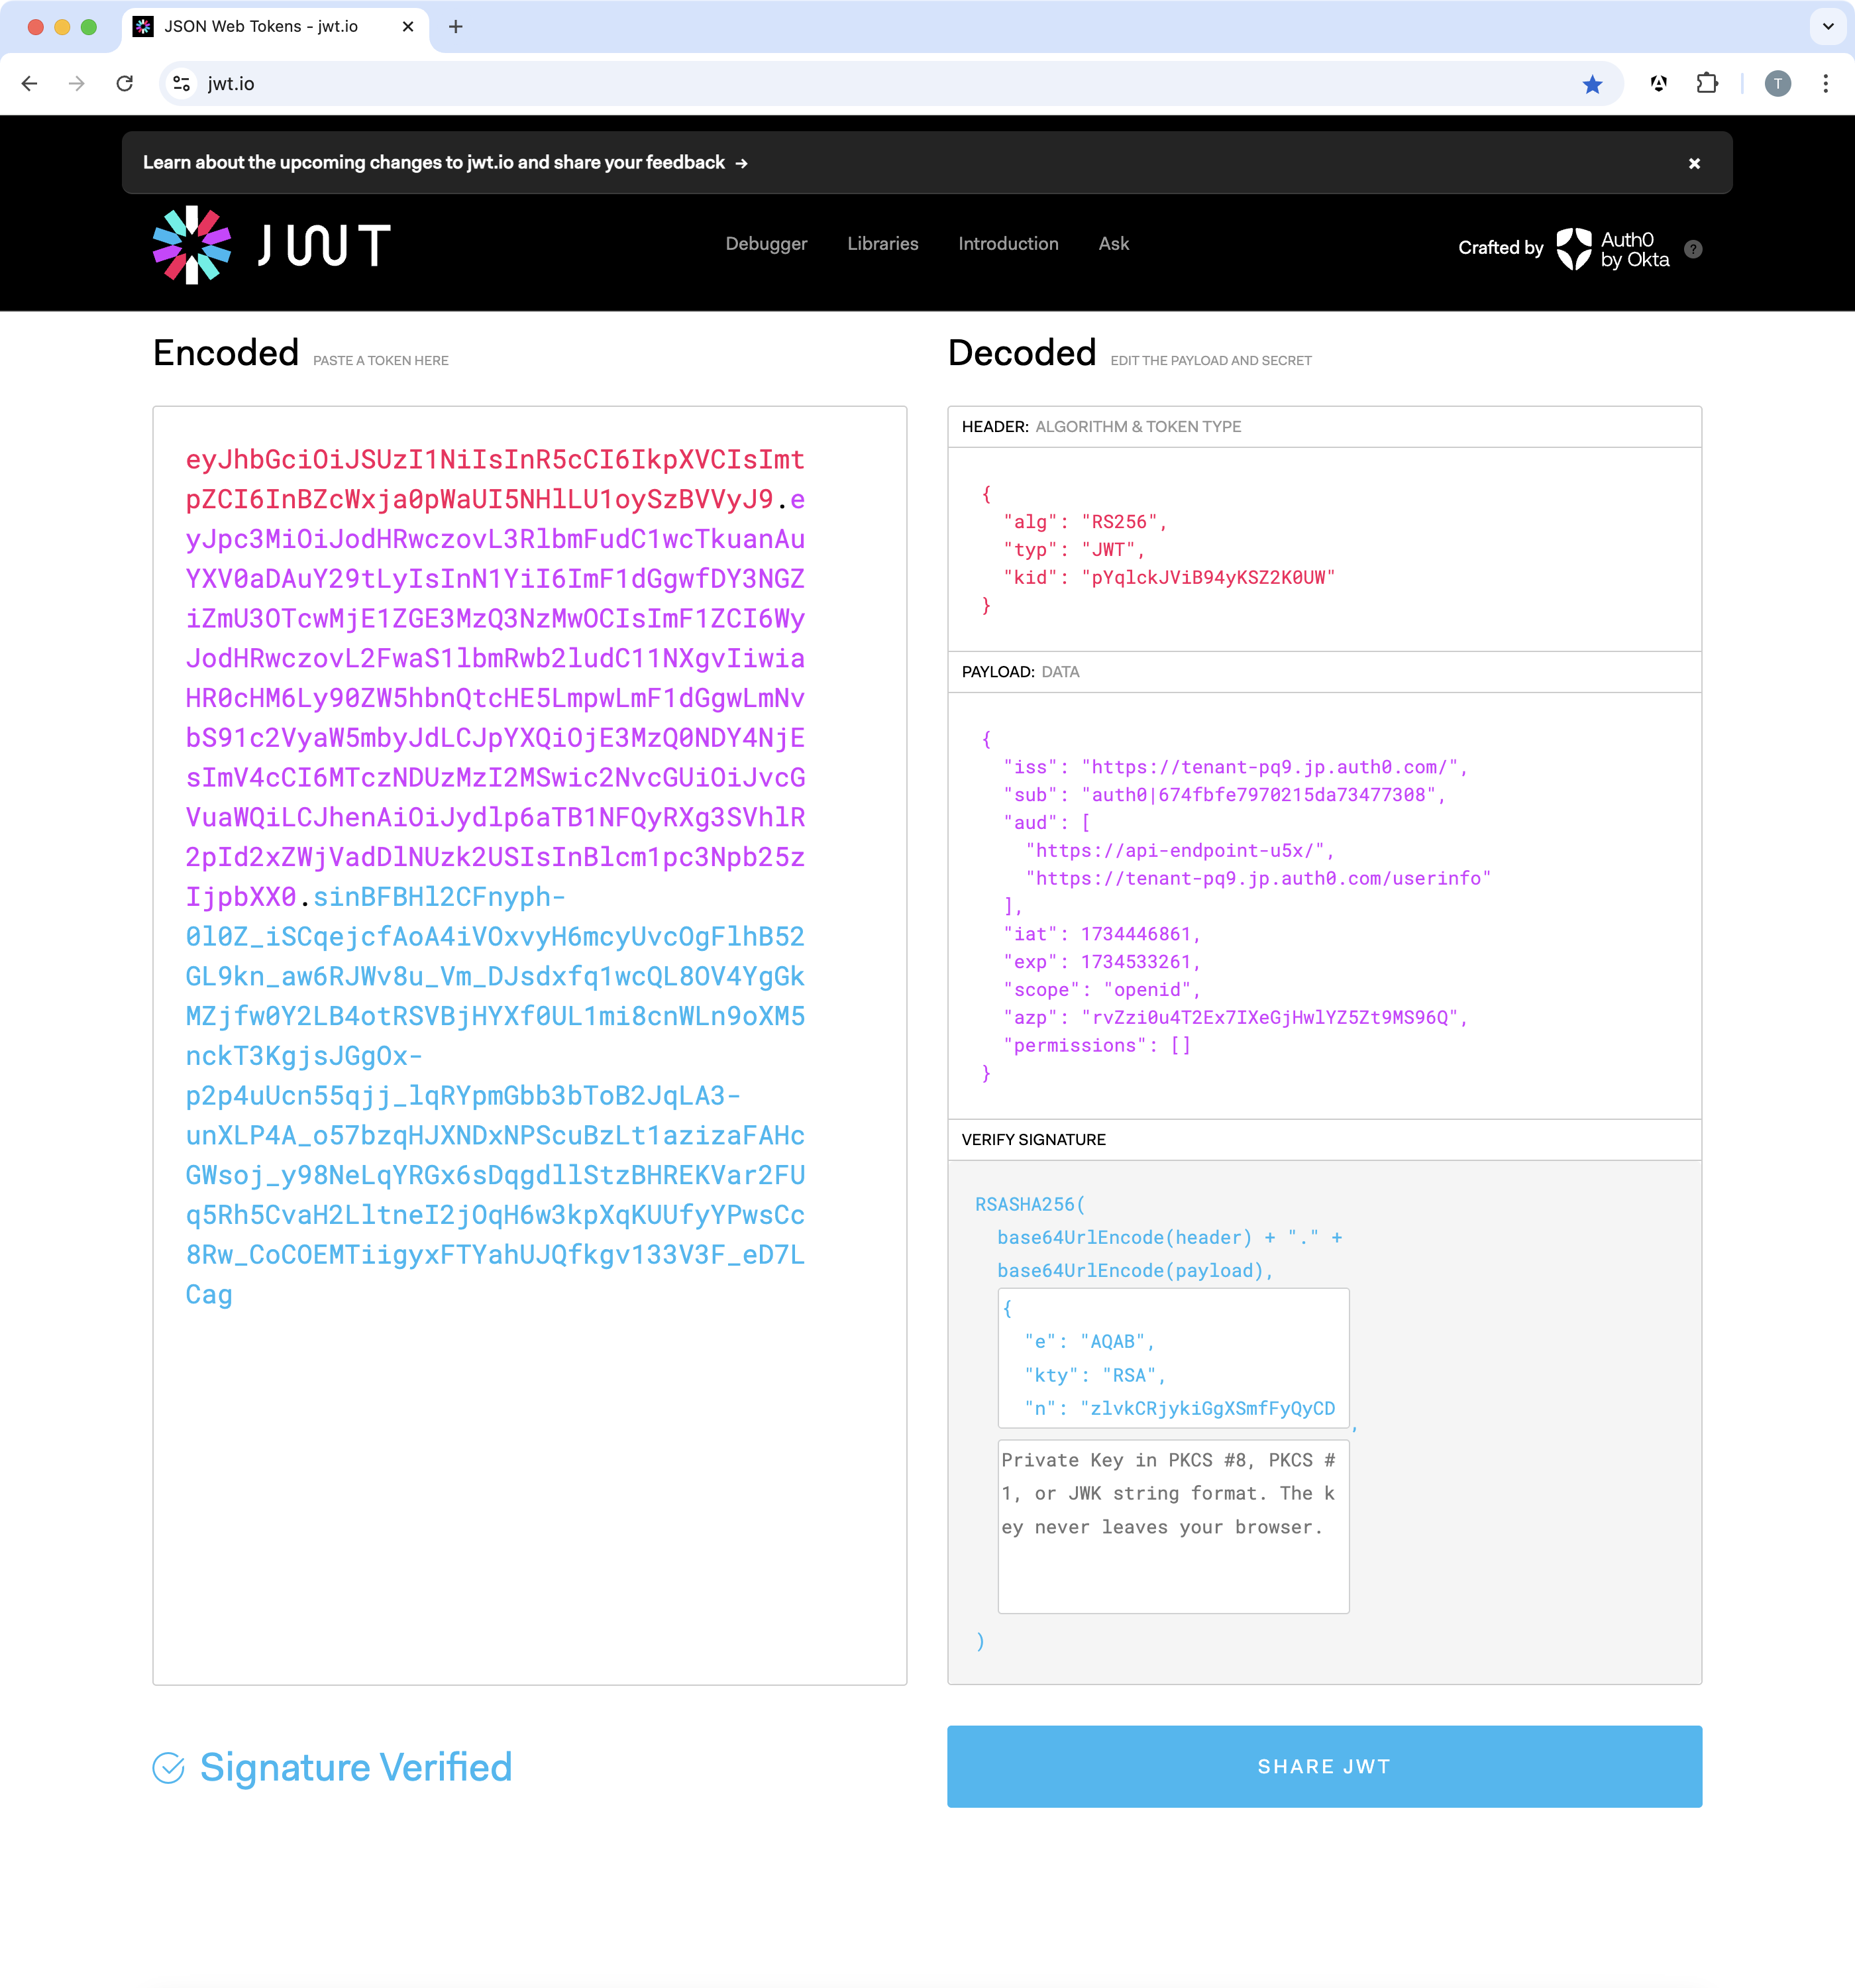
TOKEN=eyJhbGciOiJSUzI1NiIsInR5cCI6IkpXVCIsImtpZCI6InBZcWxja0pWaUI5NHlLU1oySzBVVyJ9.eyJpc3MiOiJodHRwczovL3RlbmFudC1wcTkuanAuYXV0aDAuY29tLyIsInN1YiI6ImF1dGgwfDY3NGZiZmU3OTcwMjE1ZGE3MzQ3NzMwOCIsImF1ZCI6WyJodHRwczovL2FwaS1lbmRwb2ludC11NXgvIiwiaHR0cHM6Ly90ZW5hbnQtcHE5LmpwLmF1dGgwLmNvbS91c2VyaW5mbyJdLCJpYXQiOjE3MzQ0NDY4NjEsImV4cCI6MTczNDUzMzI2MSwic2NvcGUiOiJvcGVuaWQiLCJhenAiOiJydlp6aTB1NFQyRXg3SVhlR2pId2xZWjVadDlNUzk2USIsInBlcm1pc3Npb25zIjpbXX0.sinBFBHl2CFnyph-0l0Z_iSCqejcfAoA4iVOxvyH6mcyUvcOgFlhB52GL9kn_aw6RJWv8u_Vm_DJsdxfq1wcQL8OV4YgGkMZjfw0Y2LB4otRSVBjHYXf0UL1mi8cnWLn9oXM5nckT3KgjsJGgOx-p2p4uUcn55qjj_lqRYpmGbb3bToB2JqLA3-unXLP4A_o57bzqHJXNDxNPScuBzLt1azizaFAHcGWsoj_y98NeLqYRGx6sDqgdllStzBHREKVar2FUq5Rh5CvaH2LltneI2jOqH6w3kpXqKUUfyYPwsCc8Rw_CoCOEMTiigyxFTYahUJQfkgv133V3F_eD7LCag

curl -X GET -H "Authorization: Bearer $TOKEN" \
"http://localhost:8787/verify"/Users/teruhiro/.n/bin/npm run start
> auth0-jwt-validation-demo-pi5@0.0.0 start
> wrangler dev
⛅️ wrangler 3.96.0
-------------------
[wrangler:inf] Ready on http://localhost:8787
⎔ Starting local server...
decoded {
valid: true,
header: { alg: 'RS256', typ: 'JWT', kid: 'pYqlckJViB94yKSZ2K0UW' },
payload: {
iss: 'https://tenant-pq9.jp.auth0.com/',
sub: 'auth0|674fbfe7970215da73477308',
aud: [
'https://api-endpoint-u5x/',
'https://tenant-pq9.jp.auth0.com/userinfo'
],
iat: 1734446861,
exp: 1734533261,
scope: 'openid',
azp: 'rvZzi0u4T2Ex7IXeGjHwlYZ5Zt9MS96Q',
permissions: []
}
}
[wrangler:inf] GET /verify 200 OK (326ms)
╭──────────────────────────────────────────────────────────────────────────────────────────────────╮
│ [b] open a browser, [d] open devtools, [l] turn off local mode, [c] clear console, [x] to exit │
╰──────────────────────────────────────────────────────────────────────────────────────────────────╯無事、valid = trueとなりました。
※ログの scope が openid のみになっていますが、Angular側で要求した read:data 等を含めるには、Auth0のAPI設定で RBAC(Role Based Access Control)を有効にし、「Add Permissions in the Access Token」をオンにするなどの設定が必要です。
本来は、Cloudflare Workers KVをつかって、キーをキャッシュする運用が望ましいと思いますが、今回は、ここまでにします。